Сurrent information for 2024 year and later
Need run only one command in terminal for root user in any directory:
v-add-letsencrypt-host
Old instuction:
When you go to panel url with port 8083 — you can see SSL error in your browser.
Here’s what you can do to fix that:
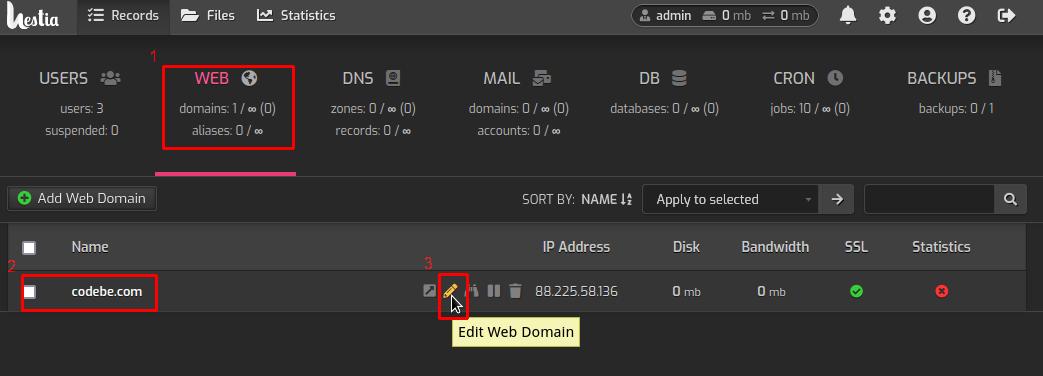
1. If you don’t have WEB domain — add WEB Domain in panel. I will use my domain codebe.com for example.
2. Go to WEB domain edit which one uses for panel:
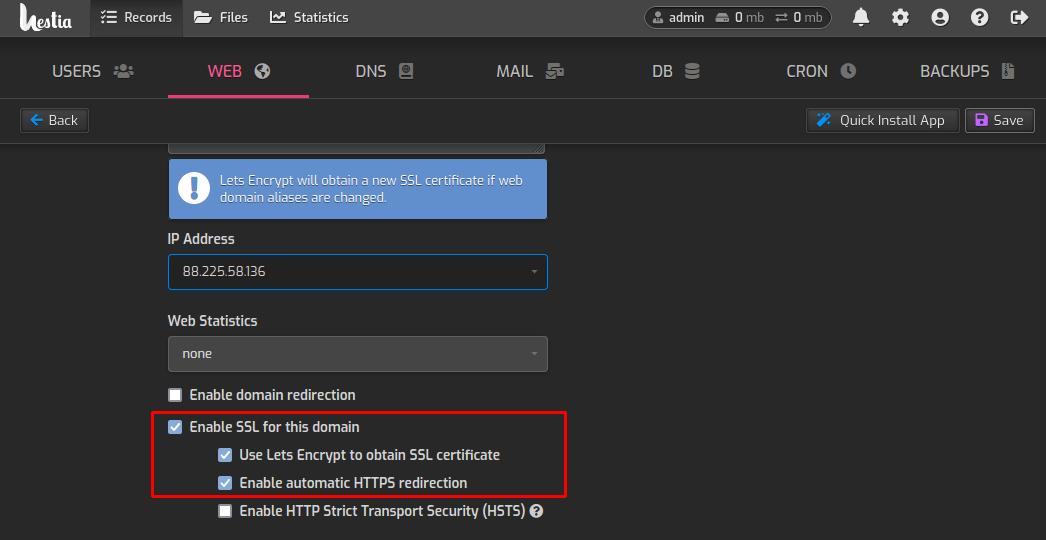
3. Enable SSL certificate for domain:
4. Connect to your server over SSH.
5. Get information for changing hestia-nginx config. Copy full path to certificate and key for you domain, for example, I have this path:
/home/codebe/conf/web/codebe.com/ssl
And I’ve this files in current directory:
799435-codebe.com.crt
799435-codebe.com.key
6. Open file in your favorite text editor:
/usr/local/hestia/nginx/conf/nginx.conf
7. Change parameters for hestia-nginx server:
....
server {
    ....
    ssl_certificate      /home/codebe/conf/web/codebe.com/ssl/799435-codebe.com.crt;
    ssl_certificate_key  /home/codebe/conf/web/codebe.com/ssl/799435-codebe.com.key;
    ....
}
....
8. Restart HestiaCP (it’s working for Debian 11):
service hestia restart
9. Well done!

